I started pickling olives quite by chance, when a friend at work brought in his surplus crop, and I found myself with half a kilo of bright green Syrian Souri olives. The results were amazing. Sadly, I think this has turned me into an olive snob, because I can’t eat the soggy things that show up alongside cafe sandwiches anymore.
UPDATES:
- More pickled olives — salt-cured, miso-cured and Mediterranean herbs.
- A guide to different types of olives grown in Israel, by the Israeli Olive Board. What I refer to as Syrian olives (a common Hebrew-English translation error) they call “Zuri.” According to Wikipedia, these are actually Souri olives, being native to Sur (Tyre) in Lebanon.
Making your own olives is neither cost-efficient nor time-efficient, but it’s worth doing because you’ll wind up with the freshest, fruitiest olives you’ve ever tasted. If you don’t have a relative or friend with an olive tree, you can get raw olives for about 10 shekels a kilo at the Carmel market (I bought a mix of green and black Syrian Souri olives on Yihye Street, that street parallel to the main market street, a few weeks ago), half the price of prepared Syrian Souri olives. After sorting each olive by hand, I had to toss out a full quarter of them, since they were either mushy or had insect holes. But in the end, I was left with olives with nice, firm white flesh.
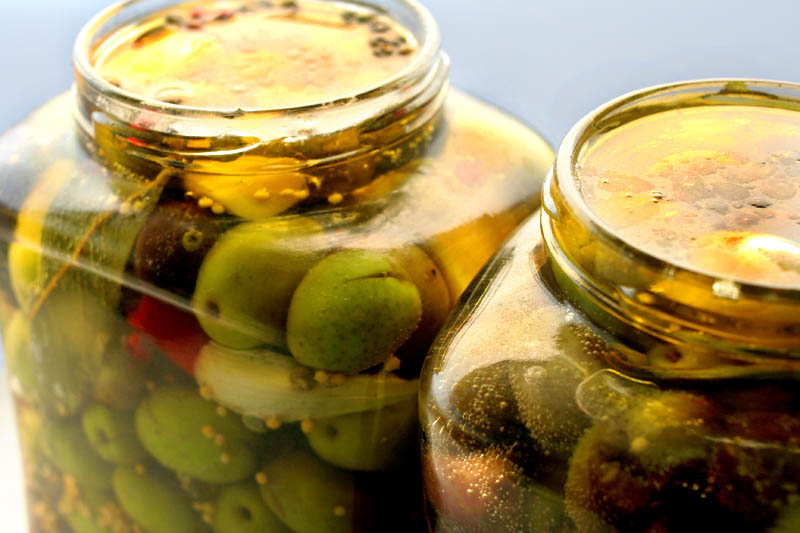
(Above, from left: black and green Syrian Souri olives pickling in the jar, fresh green Syrians, and later, cracked and soaking in their bath.)
The olives absorb much more flavor (and lose much more of their bitterness) when they’re cracked. I could taste a difference between the various olives within a single batch — those that had only a small crack were much more bitter than those that had nearly fallen off the pit. Since I’ve never made more than a kilo of olives at once, I’ve been cracking mine by hand, by smashing them with the base of a mug. Splat. My counter (and my shirt) were completely splattered with greasy olive juice in the process.
The next step is soaking them to remove most of the bitterness — you put the olives in a bowl of water, with a plate on top to keep them submerged, and change the water once a day. I’ve heard varying accounts as to how many days the olives need to soak (minimum three days). Since I don’t like bitter olives, I soaked and rinsed mine every day for a week.
Now comes the brine. I found a great recipe, along with a thorough description of the process, here. Each coffee jar I used holds about half a kilo of olives, so I added to each jar a quarter lemon, two garlic cloves sliced in half, a few bay leaves, a teaspoon of peppercorns, a teaspoon of mustard seeds and a fresh hot pepper (about 2 inches long) cut into a few pieces. The hot pepper gave the olives a nice heat. I then filled the jar with brine — two tablespoons salt in two cups water. This did not make the olives very salty, which is good in my opinion. I topped the jars with some low-grade olive oil to keep that white mold from forming, and a week later, the olives were ready to eat. They continued to improve in the week that followed.
We managed to finish our first batch within three weeks, which is good, because the last few olives were past their peak — they began to acquire a soggier, more industrial quality as time went on and the brine continued to do its work.
In any case, the olive fairy brought another batch of olives to the office yesterday — black ones this time. Needless to say, I’m having some olive tree envy, but I’ll be trying a few different ways of preparing these ones, and should have results within a month. Expect a follow-up.
Side note: As I researched various ways to prepare my olives, I found tons of recipes in English that recommended using lye and other chemicals. In comparison, nearly every recipe I found in Hebrew suggested doing things the natural way, with herbs and salt. So, spread the word.


