Blood oranges aren’t so common, although I’m not sure why not. They have a relatively discreet exterior — only a hint of a blush that tells you that no, this is not a normal orange; inside lies a shockingly red jewel of a fruit.
This year, I’ve found only one person selling blood oranges at the Carmel Market — the guy near the bottom of the shook, who also sells steamed corn and fruit juices. Coincidentally, he’s across from the one person at the shook who had limes several months ago.
What is it with the scarcity of interesting citrus this year? In any case, I decided to preserve some blood oranges for posterity, or at the very least for the next few months. Because what would make a marmalade more beautiful than ruddy sunset hues?
Inspired by David Leibovitz’s recipe for bergamot marmelade (OK, who isn’t?), I whipped up a simple jam. Like many jams, this one has three ingredients — fruit, sugar and water.

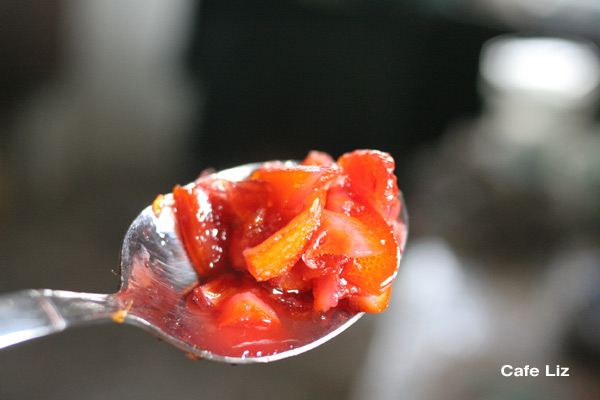
Unlike other fruits, such as strawberries or apricots, the oranges don’t cook into a mush. The sugar and the water are what make the concoction jam — by increasing them, you can increase the quantity of jam you make. Obviously, the more you increase the water and sugar, the less the concentration of orange bits in the jam. Mine was pretty packed with candied orange peels, so it’s a matter of personal choice — some recipes use twice the amount of sugar and water that I used.
Also worth noting — citrus contains a nice amount of pectin, which helps the jamming process.
A note on canning — if you want to properly can your jam, read this guide from the USDA, in order to understand what your goal is, and what the dangers are. Apparently, due to their acidity, there are less risks involved in canning fruit than in working with vegetables, but it’s important to understand the process nonetheless.

For about 0.8 liter of jam (three jars, in my case):
900 grams-1 kilo oranges
2 cups sugar
1 1/2 cups water
Rinse the oranges and chop into uneven chunks, peel and all, but removing the seeds.
Put into a pot with the sugar and water, and bring to a boil. Let cook until the jam sets. There are a few ways to check for this:
- The temperature should be 220 Fahrenheit/105 Celsius (meaning the sugar content is high enough to raise the boiling point past 212 F/100 C, and the sugar is beginning to candy).
- When drizzled on a plate that was in the freezer, and let cool in the freezer for another minute, it should “wrinkle” when nudged — meaning it should have a jammy, not liquid texture.
Put the finished jam into jars.
If you want to can your jam, first, read the USDA canning guide. Then, prepare the jars while the jam cooks, by boiling them in a pot of water (consult the guide for the exact times).
Fill the jars with jam, close them, and then return them to the water bath and boil for 10 minutes. Remove from the water and let cool.
If you do this properly, your jars should be fully sealed and you could store them outside the fridge. However, I keep mine in the fridge, since I have room. My goal in canning the jam is that it last longer, even if stored in the fridge.

